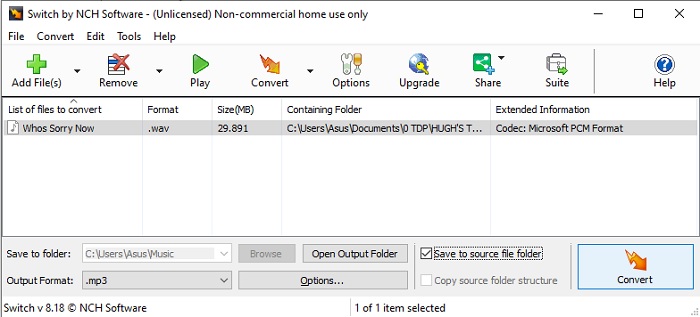

You can do Recordings in MIDI or AUDIO, but here we'll take a look at AUDIO RECORDING. When you make an AUDIO RECORDING the file you get is a WAV file (.WAV). This is a file that holds all the music information so typically is a fairly large file, something like 30-40MB. We use these for making CDs, so that's handy to have. But when you put them on the internet and make them available for others to listen to, then it is better to convert them to MP3, which is a 'compressed' form of the file. These typically are 3-4MB so don't use so much 'bandwidth' when downloading from the internet. Or, if we are listening to the music 'live', 'streaming' from the internet.
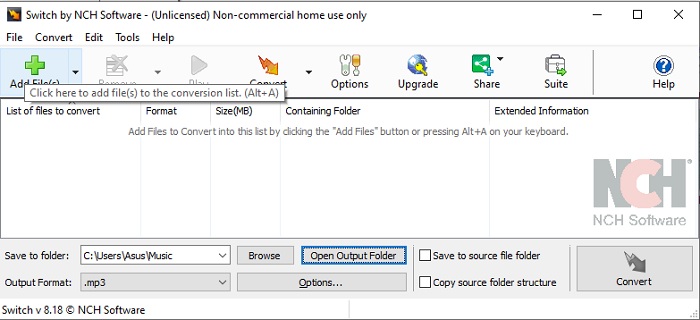
So, when you have recorded your music as WAV you really should convert that to MP3 format before uploading your music to wherever you are storing it on the internet .. Box, or Soundcloud, or whatever 'cloud' storage area you use. I'll finish this topic with explaining how to convert your music from WAV to MP3.
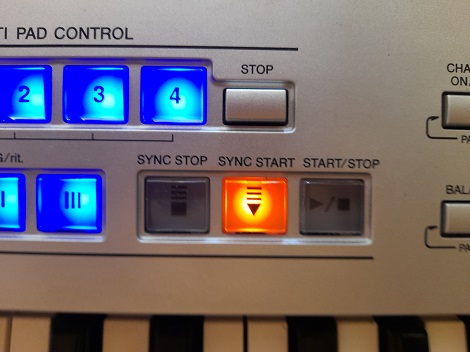
But first, doing the audio recording itself. The best way to start is to get your keyboard set up 'ready to play', with the chosen INTRO (if you're using one) and the SYNC START flashing so that as soon as you play your first chord you're off.
Get yourself composed and 'at ease'. If you're anything like me you'll be stopping the recording and starting again anything up to 15 times .. or even more. If necessary, take a break and have a cup of tea or coffee to calm yourself down before starting again.
All ready now?
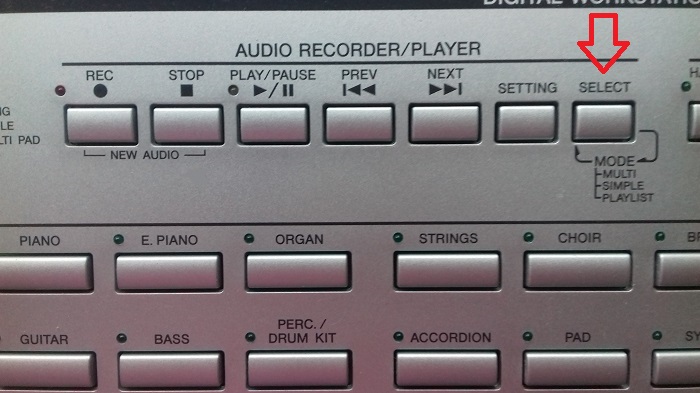
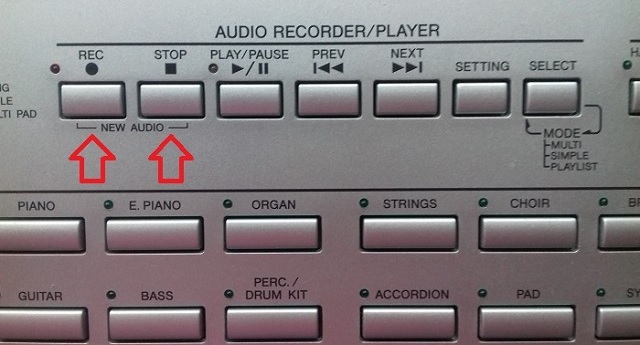
In the AUDIO RECORDER press the REC and the STOP buttons together (it does say NEW AUDIO underneath, with a line joining them) and then release the buttons. This threw me to begin with .. about two days .. and then I decided to look it up in the USER MANUAL .. as I have never before had to press two buttons to start a recording!
Now, before you look at the screen that comes up, let me just tell you that if you haven't got everything set up ready to play, you can't do it just now. While you're carrying out this next bit the keyboard won't respond to you pressing any buttons.
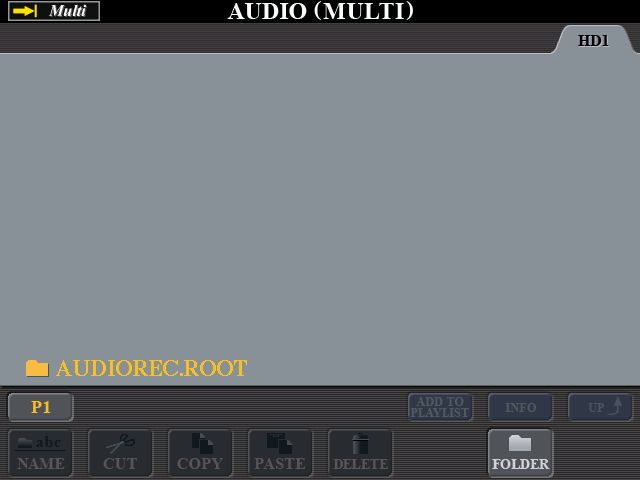
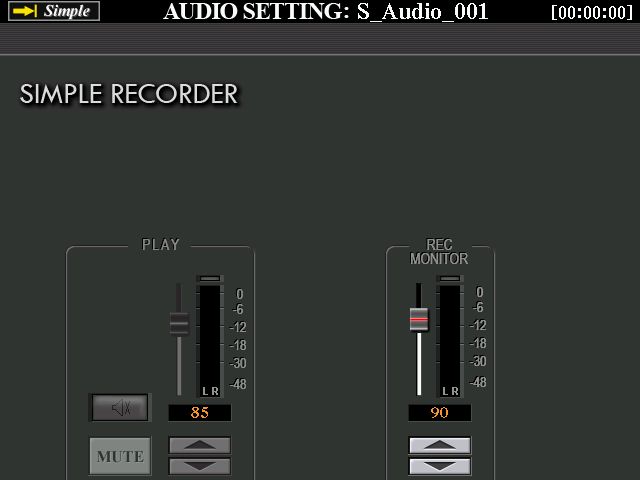
This is the screen you get. It's decision time!
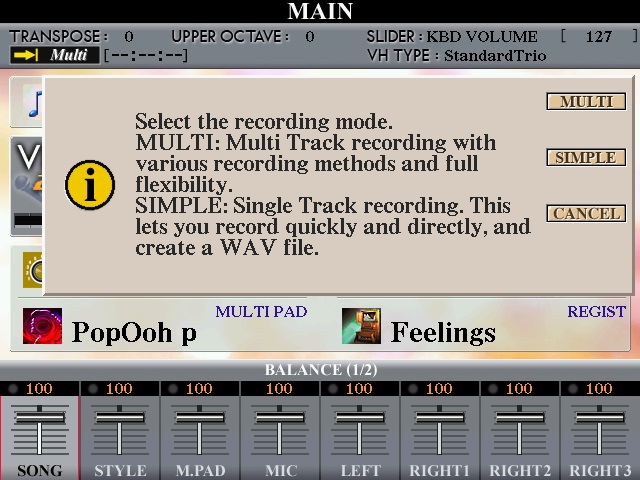
You'll only need the MULTI TRACK recording if you are wanting to do things like Bounce, Punch In/Out etc., but be aware that this is an AUD file (not a WAV file) and can only be played back on the Tyros 4. What we want to do is a SIMPLE recording, so press the button next to that.
We now get this screen.
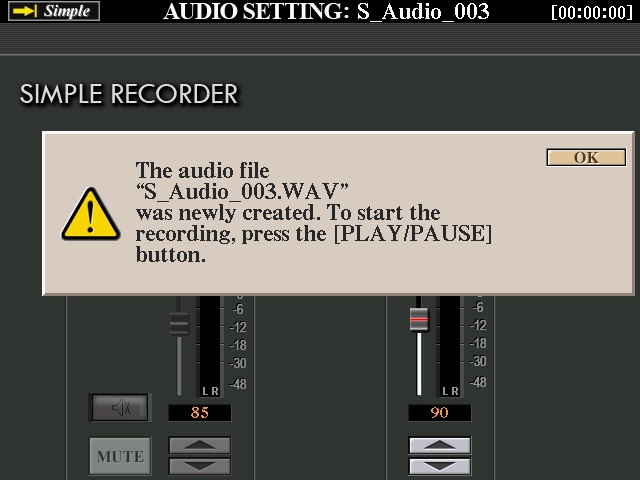
Confirm by pressing the button next to OK. We are not recording yet, but are ready to activate the recording and getting it to start. It's now that you can press the buttons on your keyboard to get everything set up to 'play' (if you haven't already done it). So how do we actually get the recording going? It told you on that previous screen, where you pressed the OK. The screen has gone now. Are you ready to go? All calm and collected? The green light by the REC is flashing at you telling you it's ready to record.
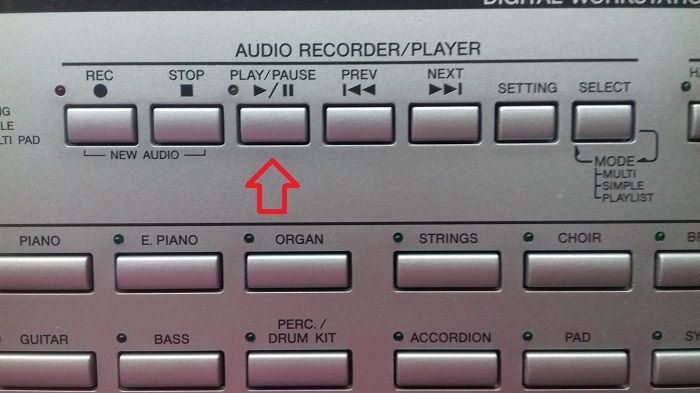
Press the PLAY/PAUSE button, wait a second or two (but not for too long) .. and off you go.
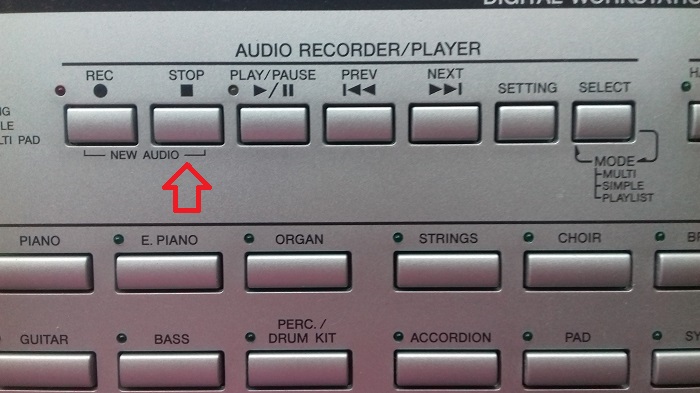
When you have reached the end of your recording press the STOP button. But don't be in too much of a hurry to do that! There's nothing worse then hearing the end of a recording 'cut off' before the music has actually finished and died away.
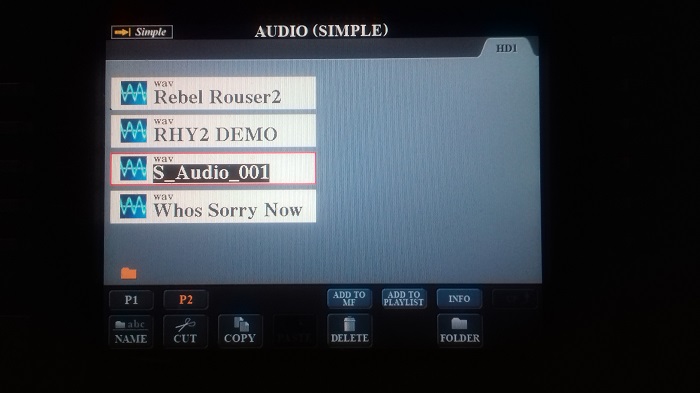
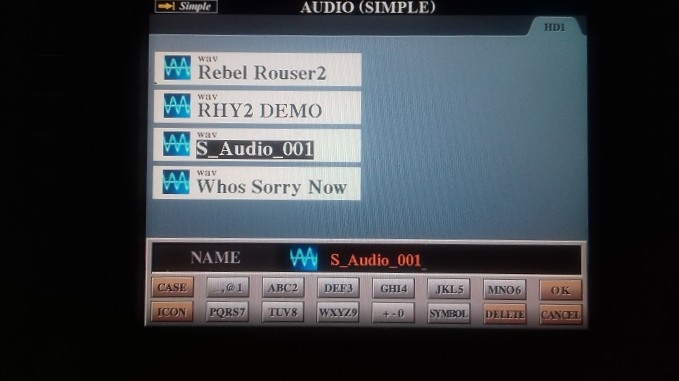
Right. We have done our recording now, and the keyboard has already SAVED the recording on HD1, giving it it's own 'default' name with a number eg. S_Audio_001, as seen in the screen we see now:
So where has the keyboard 'saved' it to? We'll take a look in a minute. For the moment the keyboard is all set up waiting for you to listen to the recording you have just done. Just press the PLAY/PAUSE button and it'll play it back to you.
Happy with it? If not, you can go back to STEP 1 and do another recording ie. press the REC and STOP buttons together etc. etc.
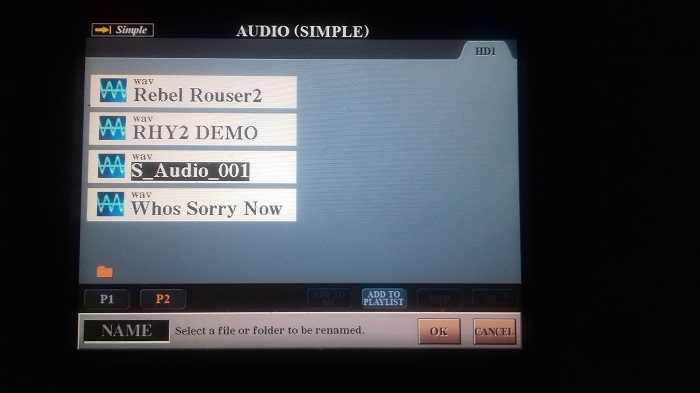
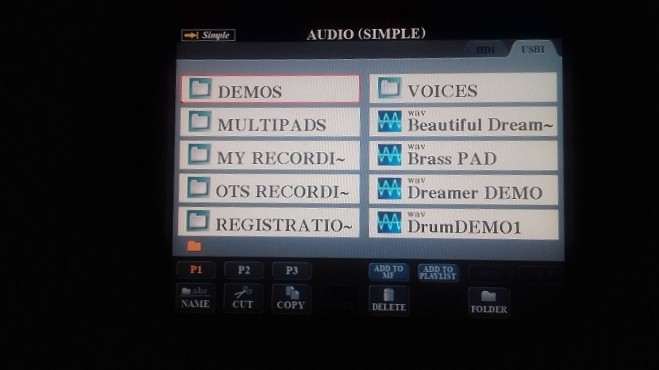
If you're happy with your recording, we now have to find where the keyboard has put it and give our song a NAME.
 ..
..