

Think I have got this under control.
To make a registration either from scratch or from an existing one.
- 1.Pick the style. (See below)
2. Press the Direct access and then the FC7 pedal
3. Touch the little bar that says "Articulation" and change the default from Articulation to Volume.
4. Exit to Main Screen.
5. Turn on the Freeze
6. Set the tempo.
7. Press the style bar on the screen
8. Tab to USER
9. Make a folder called Styles
10. Save this style into that folder
11. RENAME that style to the name of your song.
12. Exit
Here I have assumed that you have an FC7 pedal for volume control. Also that you know how to set the SPLIT POINT in the main menu.
If you really want to make a basic registration that you can use for all your registrations then name this “Basic” or “Start” or anything you think of that can help you.
So, following through part one, you may elect to have “Jive” as your basic style as it is one that you would seldom use so it would need to be changed anyway. Set tempo to 100 which may need to be changed. Now all the ‘fiddly’ bits are put into place and SAVED. If you don’t follow through as described, your keyboard may revert to “defaults” again and you will have to start from scratch!
These settings basically control the whole keyboard.
You now have the basis to build your song. The keyboard searches the presets, then the user group, then the USB’s. If you leave the style name as the original then chances are you will get the original style and not the one you wanted; that is with the correct tempo and balance.
To continue.
- 1. Bring in your named style (Touch the Style bar on the main screen) See note below.
2. Turn on the Freeze
3. Set the voices that you want into R1,R2 & R3 etc.
4. With the freeze on press reg button 1.
5. Press reg button 2. This will replicate button 1
6. Go through and change the voices and then register this to button 2.
7. Continue until you have all the buttons that you want registered. (I generally only use 4 reg buttons and I use buttons 7 & 8 for scratch regs)
8. Press the registration bar on the very top.
9. Tab to USER
10. Make another folder called Regs
11. Save your new NAMED song into that folder.
12. Exit out to the main screen.
Now when you select the registration of the song you want, the keyboard should find the registration and the named style. Check to make sure that the registration is LINKED to the style.
Warning! If you bring in any third party registrations they may change ALL the setting in your keyboard, especially the SPLIT POINT!
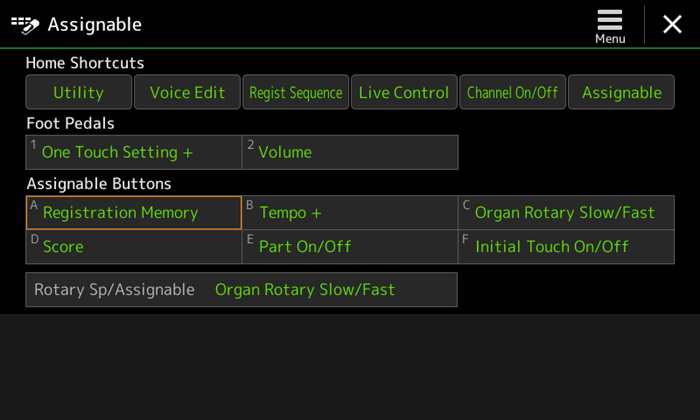
- Assigning the Buttons
This is the Main Screen showing the Assignment buttons A to F.

Press Direct Access and any one of those 5 buttons under the screen and the assignment screen will appear.
If you want the organ flutes to have the fast/slow feature you have to touch the bar which will probably be on the bottom. Then a row of boxes will appear which needs to be ticked.
I have assigned my rotary speakers to button C and the touch on/off to button F.
This is the initial assignment page that you will get. Touching any of the slots will give you the available Assignment,
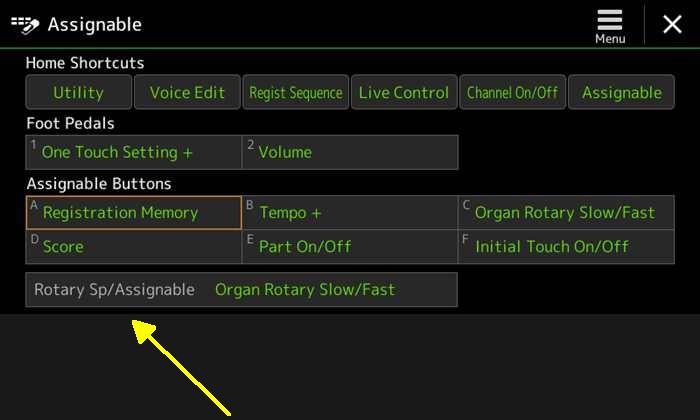
Yamaha hid the Organ Flutes for some reason. Touch on that bar and the bottom box will come up. This allows you to have the voices of your choice ticked.
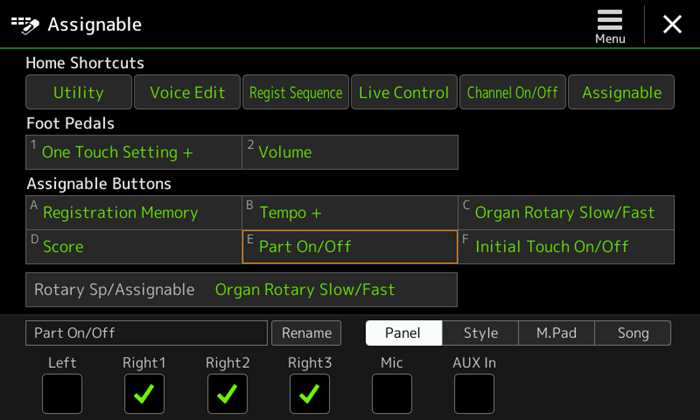
Now you are allowed to Exit from that screen and
SAVE to your registration
Take one step at a time in the order listed. It is a minefield and any wrong presses will cause you headaches.
After the first setup you may never need to go through all of this but at least it is the basis of the settings.
Polishing your Registration for Performance.
Once your registration is made then it needs to be polished. Voices ‘out of the box’ are generally bland and flat. So now we “Polish the Registration”
Press the Menu button on the panel face and see this pic.
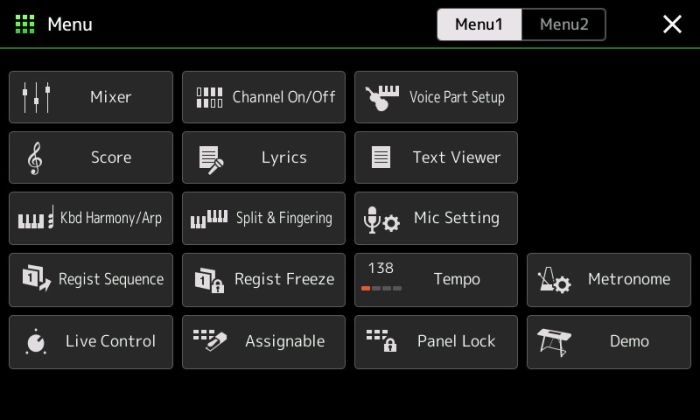
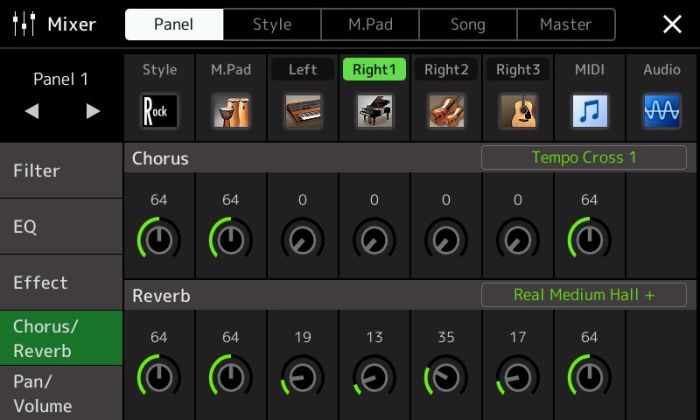
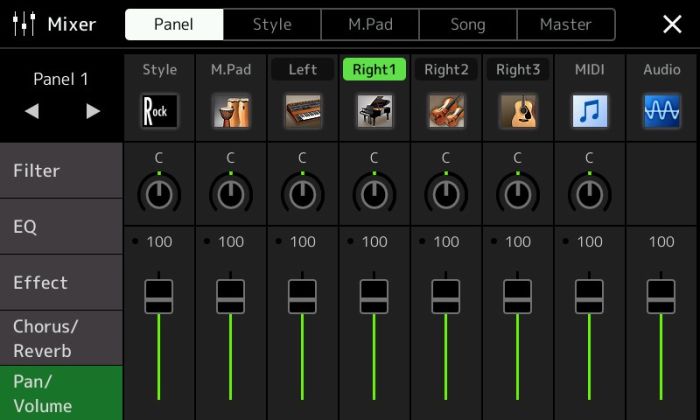
Select “Mixer” (top left) and get this:-
The bottom sliders are for the volume of each part of the voice. Touch the slider and an orange border will appear. Use the big black wheel (BBW) to adjust the volume.
The Circles (C) are for Panpot. Pan Position. Touch a circle and it will go Orange. Use the BBW to position the instrument where you want it. Remember, that to your audience when playing live, the piano is on the left so you have to put it on the Right. (Please yourself ). Now SAVE that lot by pressing EXIT, get back to the main screen and save the registration.
Next move.
As I pointed out earlier, the voices are fairly dead and needs to be juiced up. This is where you adjust the Chorus and Reverb. Again, touch the circle and use the BBW to adjust the sounds. I generally set mine to about 25-30 for chorus and reverb.
SAVE this lot by saving your registration.
Next; control of the voices.
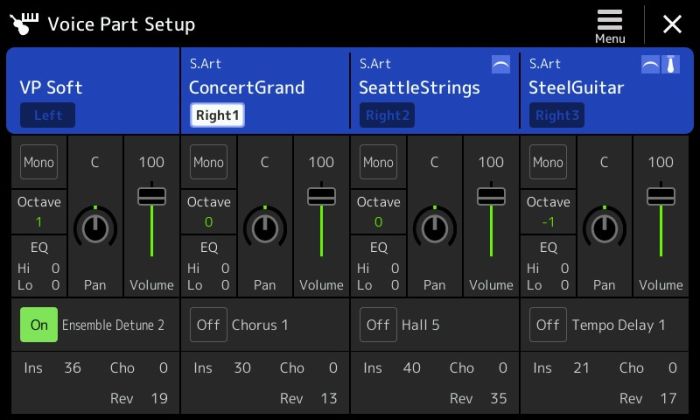
To get this, look at picture 5. It is on the top of column 3.
This is where you can change the Octave, Mono, volume and LOTS of other things.I think that this is where the DSP is located on SX900 & Genos but not sure. You can have great fun changing the settings and trying them and the great part is that until you SAVE them to your registration then they will have no effect when you go back to the main screen; they will revert to what they are now.
If all goes to order then you will have a registration that is good for you to listen.
DON’T FORGET TO SAVE.
Kind Regards, Den,
 ..
..