Movie Maker from Windows Live Essentials 2012
Windows Movie Maker

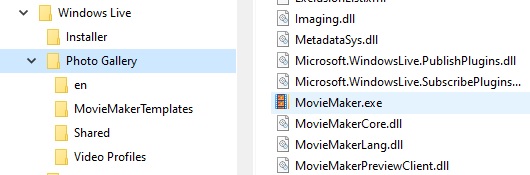
This is the program I normally use for making Videos from MP3s and photographs stored on my computer .. or pictures/video clips I have downloaded from the internet that are royalty free. Movie Maker was originally 'packaged' with Windows XP, but there was a newer version bundled with Windows Live Essentials which was much better, and easier to use, and this is the one I am using here. Unfortunately, this version of Movie Maker is no longer available for download with Windows 10. But if you have it, great! Go to Local Disc (C:), scroll down to Program Files (x86). Click on that and look for Windows Live. If that's not there, then you don't have it. If it is there, then click on Windows Live, scroll down to Photo Gallery and click on that. MovieMaker.exe is on the right. If you do a right-click on that you have the option to Create Shortcut to click on on your desktop.
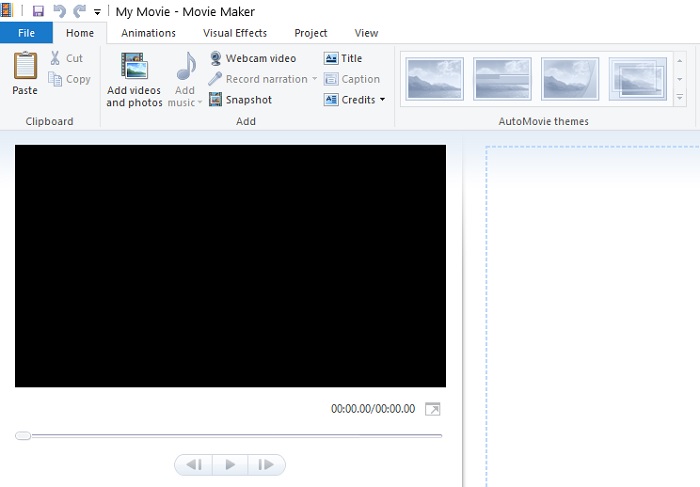
When you first run Movie Maker this is what you see. This is the Home screen. The tabs over the top are all the options to make the video; the left hand black square is where you can 'play' the video; and the area on the right is where all your material is dropped as you put the video together.
You start by clicking on Add videos and photos, which you choose from a folder on your computer. So best to get all the photos, video clips and the MP3 you want to use all into a folder ready and waiting.
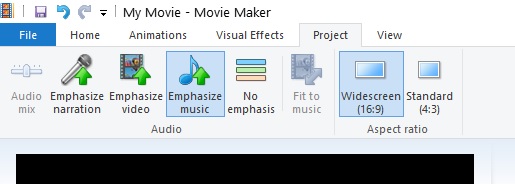
But before you start doing this, decide what type of video you want to do. There are two sizes, Widescreen (16:9) or Standard (4:3). If you're doing Widescreen then basically your pictures should be 1920 x 1080 pixels (1920 ÷ 16 = 120. 120 x 9 = 1080). To set which of Widescreen or Standard you want to do, click on the tab Project at the top. And as the objective is for people to listen to your music, you may as well click on Emphasise Music too.
You will have seen on that Home Screen that you can create a Title from here. You can choose a background colour, the font you want to use and the size of font.
This video below explains how to use Movie Maker. Bear with it, as once he gets into the nitty gritty of the program he explains everything very well.
How to use Windows Live Movie Maker - Easy Tutorial
This is what your working page looks like as you start putting your video together.
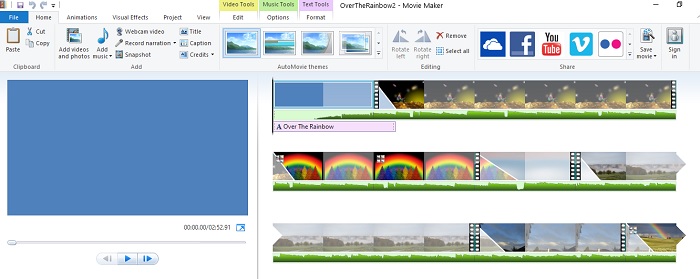
Having put all your photos & video clips into that area to the right, you can pick up and drag any one of them to left or right. And if you click the mouse on any one of them and press the Delete on your keypad it will remove that image.
You can also click on the Music symbol (Add music) at the top and add your MP3. The MP3 will 'stop playing' when you reach the end of the pictures you have added so far, but the MP3 is all there. As you add more pictures you get to hear more of your MP3.
Next, move across to Animations.

Click with your mouse on one of the images. The Transitions are at the top on the left, and the Pan and Zoom are on the right.
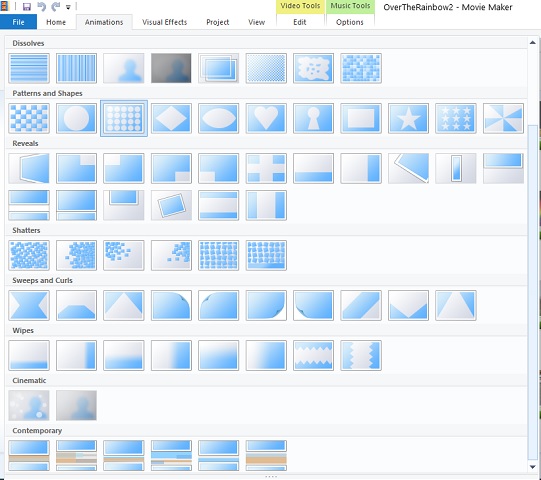
TRANSITIONS put interesting changes from one picture to the next. Hover your mouse over a transition and it will show you the effect you will get. Click on the one you want. To see all the TRANSITIONS available click the 'down-arrow' on the right hand side and you get this.
PAN and ZOOM are over on the right, and again click on the 'down-arrow' on the right to see all the options available. Hovering your mouse over the top of the Pan/Zoom will show you what happens with the picture. Click on the one you want.

At any time, you can SAVE your work as a wlmp file. It is definitely worth doing this, as if you haven't finished your project you can then get back to it later by double-clicking on the file and it will launch your project back up again so you can carry on with it and make more changes to your work. Please note that you must not move any pictures from one folder to another once you have saved one of these wlmp files, or when you want to get it up and running again it won't be able to find the pictures.
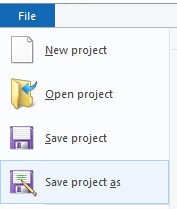
To do this, click on File at the top, then Save project as
When you have finally finished your project, you need to SAVE it as an MP4. There are various formats depending if you want to put your video on YouTube, or Facebook etc. Go back to the Home screen and click on the Save movie on the right.
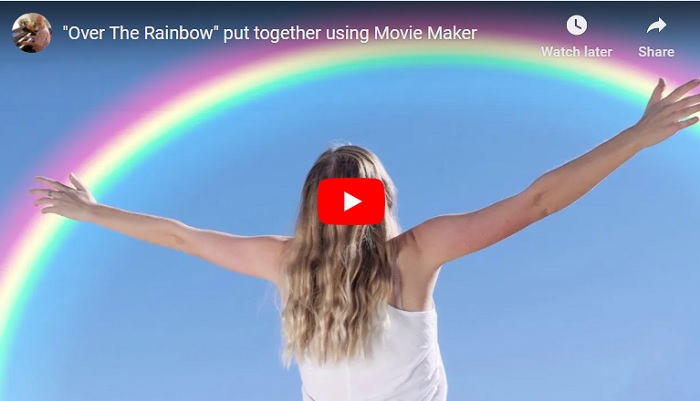
This is the final video I put up on YouTube using Movie Maker.
Click the back-arrow after watching to get back to this page.
This is the program I normally use for making Videos from MP3s and photographs stored on my computer .. or pictures/video clips I have downloaded from the internet that are royalty free. Movie Maker was originally 'packaged' with Windows XP, but there was a newer version bundled with Windows Live Essentials which was much better, and easier to use, and this is the one I am using here. Unfortunately, this version of Movie Maker is no longer available for download with Windows 10. But if you have it, great! Go to Local Disc (C:), scroll down to Program Files (x86). Click on that and look for Windows Live. If that's not there, then you don't have it. If it is there, then click on Windows Live, scroll down to Photo Gallery and click on that. MovieMaker.exe is on the right. If you do a right-click on that you have the option to Create Shortcut to click on on your desktop.
When you first run Movie Maker this is what you see. This is the Home screen. The tabs over the top are all the options to make the video; the left hand black square is where you can 'play' the video; and the area on the right is where all your material is dropped as you put the video together.
You start by clicking on Add videos and photos, which you choose from a folder on your computer. So best to get all the photos, video clips and the MP3 you want to use all into a folder ready and waiting.
But before you start doing this, decide what type of video you want to do. There are two sizes, Widescreen (16:9) or Standard (4:3). If you're doing Widescreen then basically your pictures should be 1920 x 1080 pixels (1920 ÷ 16 = 120. 120 x 9 = 1080). To set which of Widescreen or Standard you want to do, click on the tab Project at the top. And as the objective is for people to listen to your music, you may as well click on Emphasise Music too.
You will have seen on that Home Screen that you can create a Title from here. You can choose a background colour, the font you want to use and the size of font.
This video below explains how to use Movie Maker. Bear with it, as once he gets into the nitty gritty of the program he explains everything very well.
How to use Windows Live Movie Maker - Easy Tutorial
This is what your working page looks like as you start putting your video together.
Having put all your photos & video clips into that area to the right, you can pick up and drag any one of them to left or right. And if you click the mouse on any one of them and press the Delete on your keypad it will remove that image.
You can also click on the Music symbol (Add music) at the top and add your MP3. The MP3 will 'stop playing' when you reach the end of the pictures you have added so far, but the MP3 is all there. As you add more pictures you get to hear more of your MP3.
Next, move across to Animations.
Click with your mouse on one of the images. The Transitions are at the top on the left, and the Pan and Zoom are on the right.
TRANSITIONS put interesting changes from one picture to the next. Hover your mouse over a transition and it will show you the effect you will get. Click on the one you want. To see all the TRANSITIONS available click the 'down-arrow' on the right hand side and you get this.
PAN and ZOOM are over on the right, and again click on the 'down-arrow' on the right to see all the options available. Hovering your mouse over the top of the Pan/Zoom will show you what happens with the picture. Click on the one you want.
At any time, you can SAVE your work as a wlmp file. It is definitely worth doing this, as if you haven't finished your project you can then get back to it later by double-clicking on the file and it will launch your project back up again so you can carry on with it and make more changes to your work. Please note that you must not move any pictures from one folder to another once you have saved one of these wlmp files, or when you want to get it up and running again it won't be able to find the pictures.
To do this, click on File at the top, then Save project as
When you have finally finished your project, you need to SAVE it as an MP4. There are various formats depending if you want to put your video on YouTube, or Facebook etc. Go back to the Home screen and click on the Save movie on the right.
This is the final video I put up on YouTube using Movie Maker.
Click the back-arrow after watching to get back to this page.