If you use a camera (or a mobile) to make a recording of yourself playing your keyboard, then the quality of the sound will be nothing like the AUDIO you would get when recording directly from the keyboard as WAV or MP3. When the recording is picked up by microphones there will be 'echo' in the room for starters, which is also picked up by the microphones. Ditto any extraneous noises, like the clicking of buttons being pressed .. or the dog barking next door!
The recordings our keyboards make directly these days are superb .. as good as anything that in the old days could only be done in a recording studio. This topic is to explain how to replace that MIC recording with an MP3 or WAV file from the keyboard.
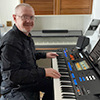
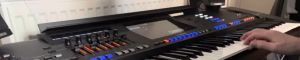
First, here is Den playing a piece and recording himself playing ... using a camera for the recording (records as an MP4) .. but also setting the keyboard off to record an MP3 at the same time (he has a Yamaha SX-700, which can record directly to MP3). His camera does have stereo microphones, so the sound quality is reasonable .. but if you listen carefully, right from the start there is a 'hollow echo', as well as a 'crackling' noise running through it. Recording with a mobile will be nothing like as good .. and the mobile I have only has a single microphone, so if using that, the audio recording will be in mono (or two-track mono) for starters.
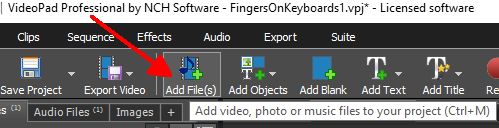
Next step is to load this MP4 video, and the MP3 into VideoPad, the program I use for handling videos.
In VideoPad you click on AddFiles, and click on the ones you want to import .. in this case the MP4 (which has an audio file with it); and the MP3 audio file from the keyboard.
Put both files into VideoPad (or whatever program you are using for handling Videos).
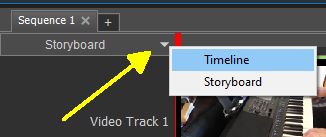
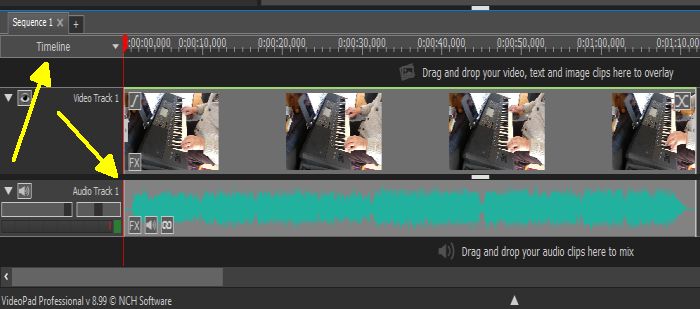
VideoPad has two options for working on a video. Storyboard and Timeline. Storyboard shows the MP4 we have loaded in, together with the Linked Audio (the camera one).

To be able to work with the video we have to switch to Timeline view by clicking on the down-arrow and choosing Timeline from the drop-down box (if it isn't in Timeline mode already).
In this view, the LINKED audio track shows separately at the bottom, so we can work with it.
Click on the Audio Track to make sure you are on it, and do a right-click .. which shows the options below in a drop-down box.
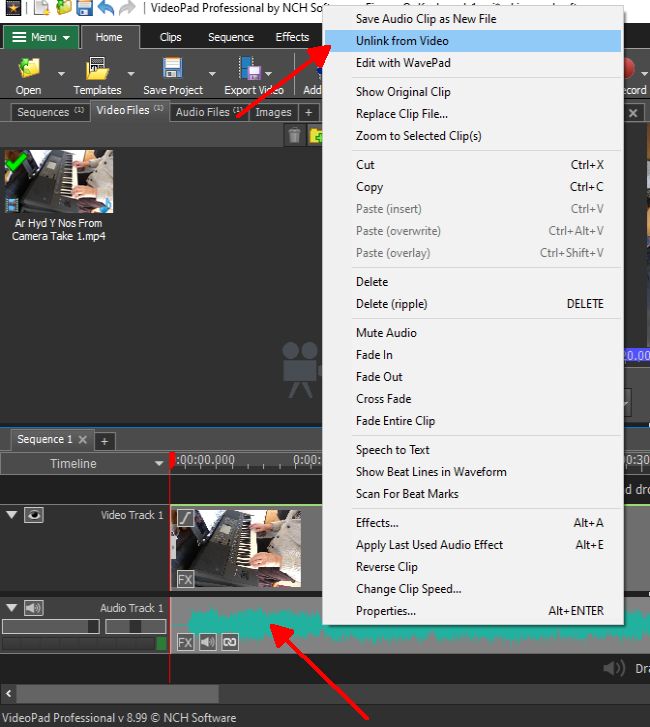
The one we want is Unlink from Video .. so click on that.
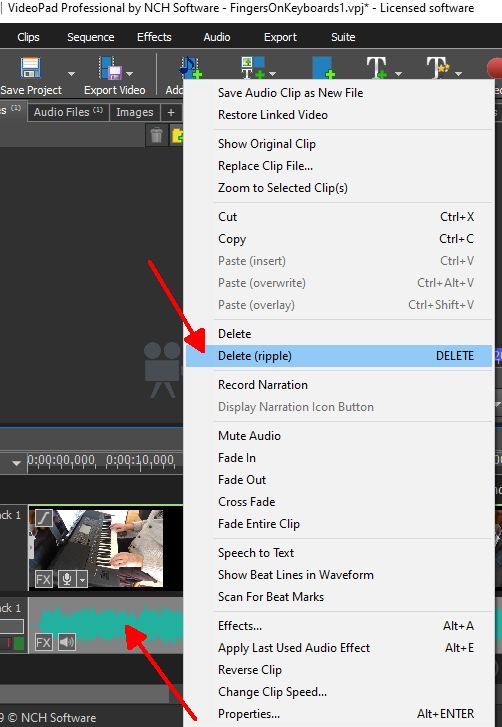
The audio track that was with this video is now completely separated from it .. so we can DELETE it.
Do a right-click over the audio file, and in the drop-down box click on DELETE (Delete ripple).
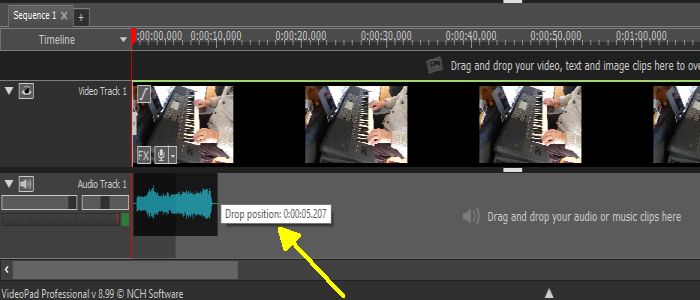
We now have an 'empty' Audio Track 1 ...
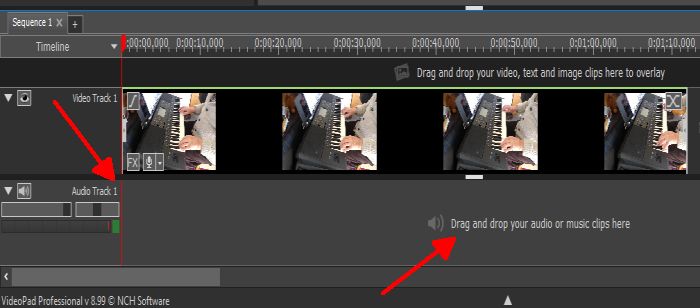
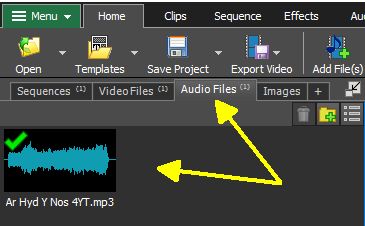
... where we can drag and drop the MP3 file from the Audio 'bin' (top left).
Drop it anywhere in that space.

In order to position that audio waveform to 'sync' with the fingers playing in the video, it would be best to remove that bit of 'silence' at the beginning of the track. Now we could have done that with Audacity before importing the MP3 into VideoPad, but as VideoPad has the facility for doing this I will do it using VideoPad.
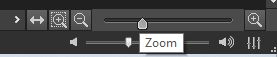
To make the waveform more easily accessible we need to stretch it out a bit (so we can see better what we are doing).
On the right, there is a ZOOM facility, so click on the 'marker' and drag it a bit to the right so we can be more accurate with the bit of 'silence' we wish to remove.
Next, at the top, click on the tab Audio.

Everything we do from now on will only apply to the Audio MP3 (we don't want the video part interfered with).
Move the red marker line across the 'silent' part of the audio track until it is just to the left of where the audio starts.
We get a pair of scissors showing, which we click on to CUT the audio at that point.
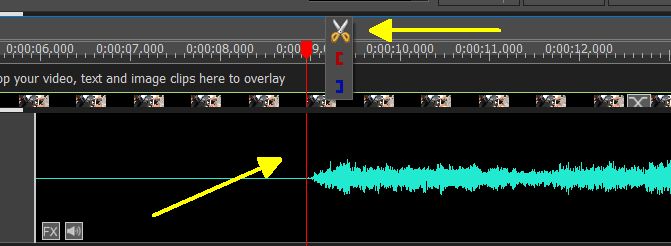
So do that, and the audio track is split into two.
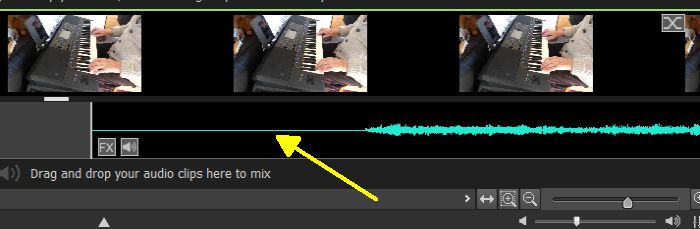
Click in the area I have marked with the yellow arrows ...
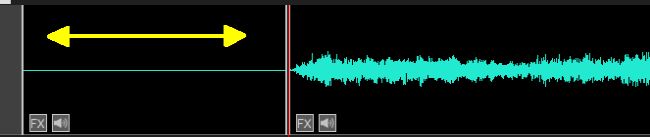
... and this area will be selected for the next step ...
... which is to DELETE that bit of silent audio.
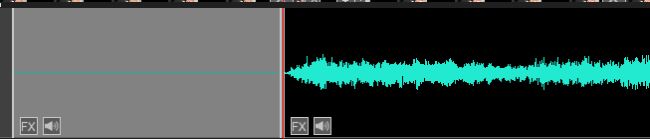
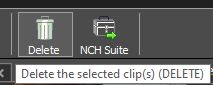
So either click on the delete button on your computer, or the Delete at the top of the VideoPad program.
The bit of 'silence' has been removed from the audio track ...

... so all we need to do now is to 'click and hold' with the mouse and drag that audio to the left. We are hoping to 'drop it' so that the 'audio' syncs with the fingers in the video. For starters, I'll move it all the way to the left (so the Offset is zero) ...
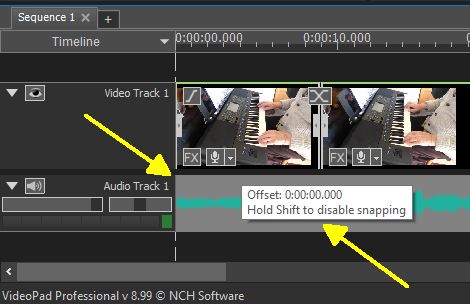
... and then gradually move it along to the right and experiment (by 'playing' the video) to find out the best Offset value for the audio to sync with the fingers playing.
First .. this is what you get with the audio on an Offset of zero.
Then by moving the audio along to the right, I reckon that this is roughly the best position for the audio to be.
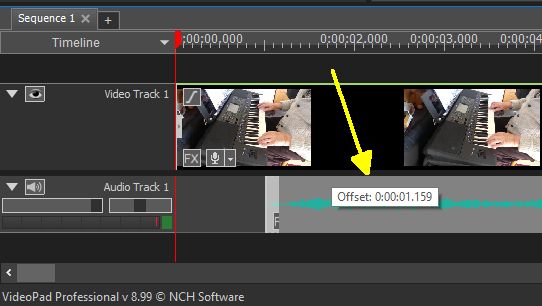
You may have to move the ZOOM tab a bit further to the right in order to get smaller steps of Offset.
Anyway, see if I have got it about right by watching and listening to the below.
Hugh
 ..
.. 

 ..
..